How to use thermal screensHere you will find all our downloadable information about how to use your new screen, about our textile screen inks, and about other types of print media you could use. There is also a colour mixing sheet.Just click on the links below to download an information sheet and print off for convenience whilst using your new products. There is also a step by step guide below to show you what to do.
How to Use Your Thermal ScreenTextile Screen InksChoosing Print MediaColour MixingGuide to Uploading Custom Screen Images For more about suitable images for custom screens, and ordering, take a look at our frequently asked questions. Set up your workspace (1)You will need a suitable print surface (e.g. felt covered board) covered with a washable drop cloth. Gather all the things you will need before you begin: screen(s), squeegee(s), ink, cloth, pins and some kitchen roll. A container such as a cat litter tray is handy for keeping everything tidy and preventing spillage. 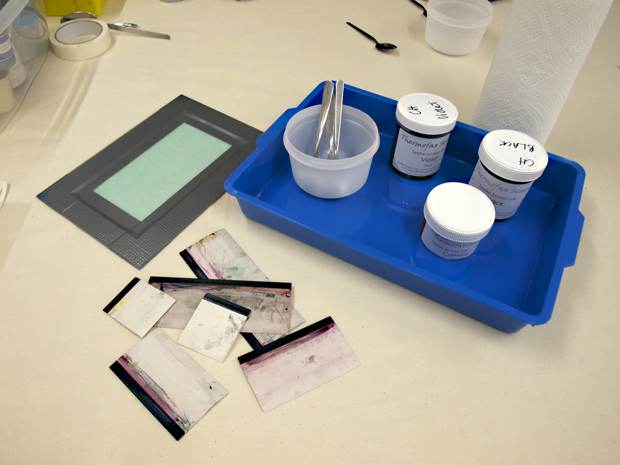 Set up your workspace (2)Pin your chosen fabric to the print surface. Push the pins in almost horizontally so that they don’t stick up too much.  Printing (1)Place the screen on the fabric ready for the first print. Spoon the ink at the top of the screen – be reasonably generous and make sure there is enough ink to avoid running out half way down the screen. Fine line designs will use less ink and require less pressure on the squeegee than chunkier designs. 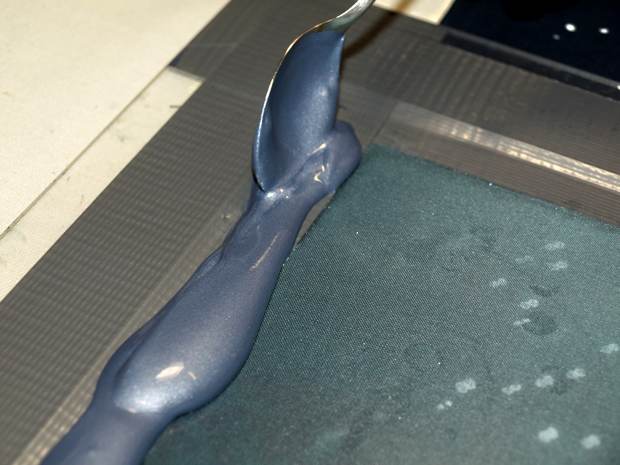 Printing (2)It can be helpful to do a test print on the drop cloth or an old piece of fabric first. You will be able to guage the amount of pressure / ink required. 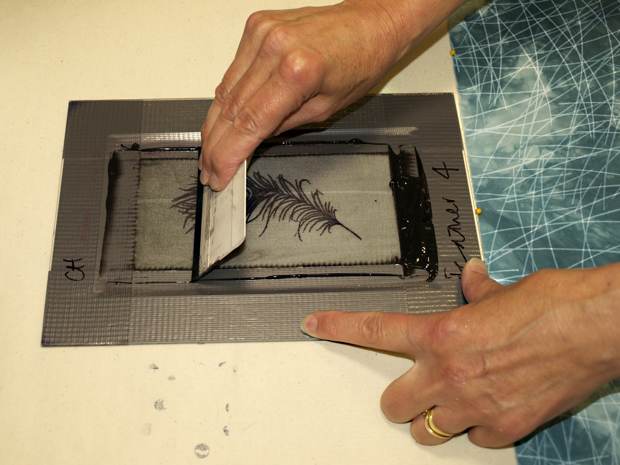 Printing (3)Hold down the edge of the screen with one hand (use your left hand if you are right handed) and pull the squeegee towards you with the other hand.  Printing (4)Scoop up the remaining ink at the bottom of the screen with the squeegee and deposit it back at the top of the screen ready for the next print. 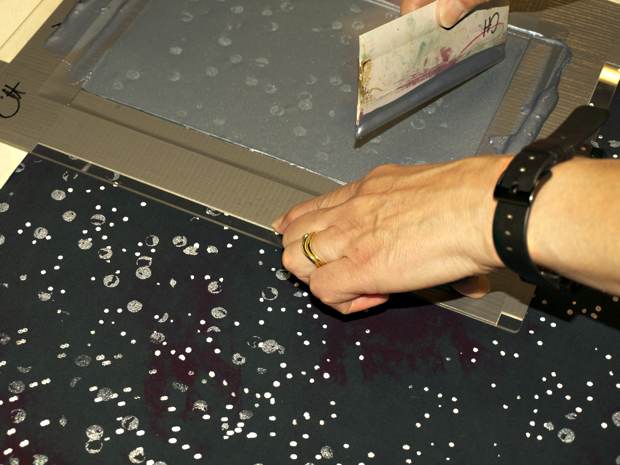 Printing (5)Lift the screen carefully to reveal the print. If you still have the squeegee in your hand make sure it is held over the screen to avoid dripping ink onto the fabric. 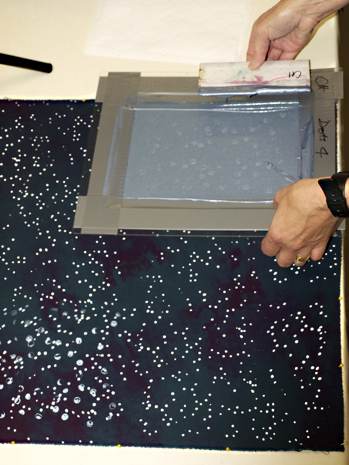 Printing (6)Place the screen down in position for the next print. If the screen overlaps the first print you may pick up wet ink on the back of the screen which will print as a ‘ghost’ image the next time you place the screen down. On a large piece of cloth, you can avoid ghost prints by leaving space between the second and subsequent prints and then filling in the gaps as the earlier prints become touch dry. However, if you need to print close to the wet print without waiting for it to dry, you can lay a piece of kitchen roll over the wet print to prevent the ink being picked up. Sometimes ghost prints are a welcome addition – if you are printing a textured background for example. 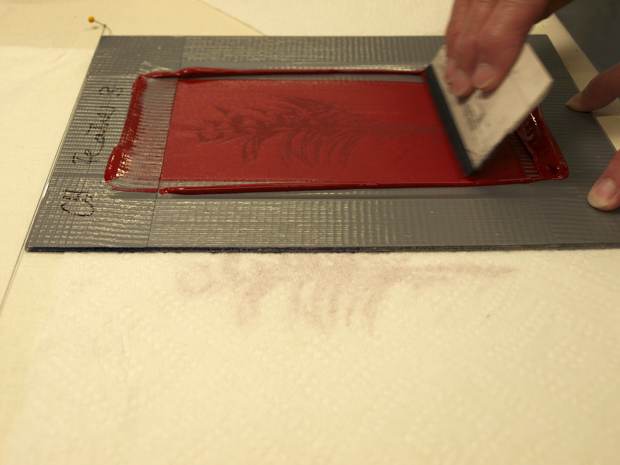 Washing the screen (1)Always wash the screen as soon as you have finished with tepid water and a soft sponge or cloth. Don’t use detergent or anything abrasive as it will damage the screen. Don’t allow ink to dry in the mesh as it will permanently damage the screen. If you want to have a break always wash the screen. 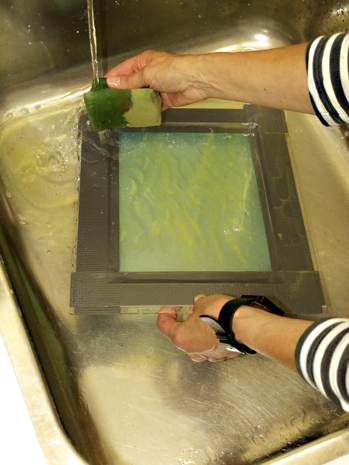 Washing the screen (2)Pat the screen dry with an old towel after washing. 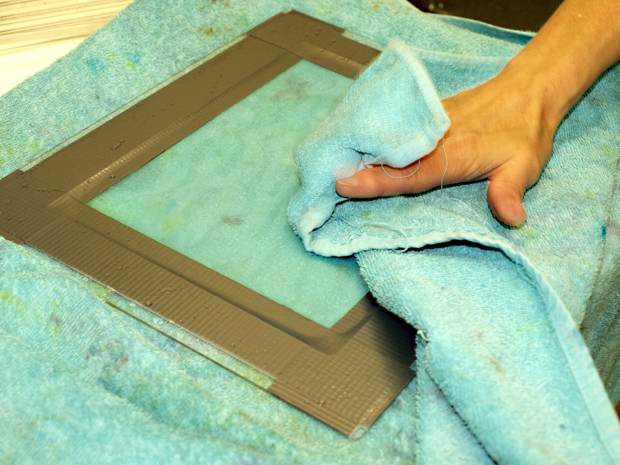 Washing the screen (3)Squeeze any residual moisture from the edge of the tape with the corner of the towel. 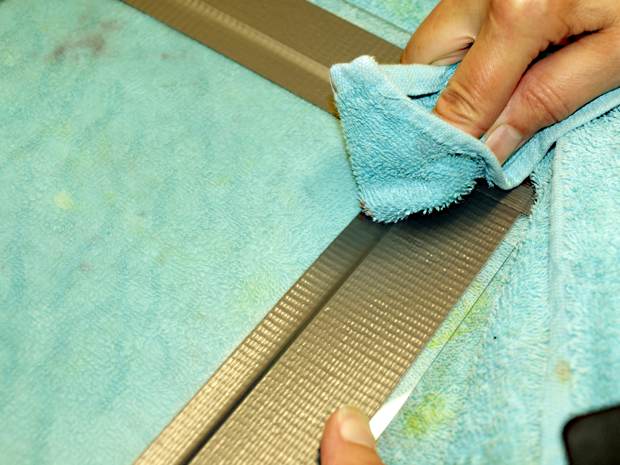 Printing shapes (1)Cut shape(s) – in this case fish – out of a piece of freezer paper and then iron the sheet of freezer paper on to the fabric (you can also use sticky back plastic). Print over the hole(s). 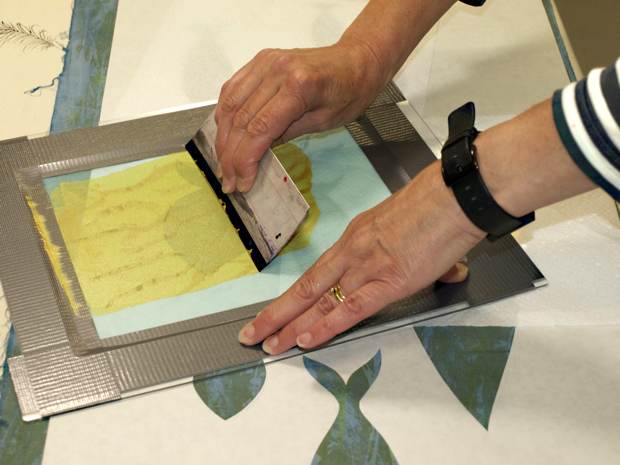 Printing shapes (2)Allow the ink to become touch dry and then peel off the freezer paper to reveal the shape(s). To print negative space around a shape, cut shape(s) from freezer paper or sticky back plastic and iron or stick the shape(s) onto the fabric. Print the fabric and when the ink is dry, peel off the shape(s). 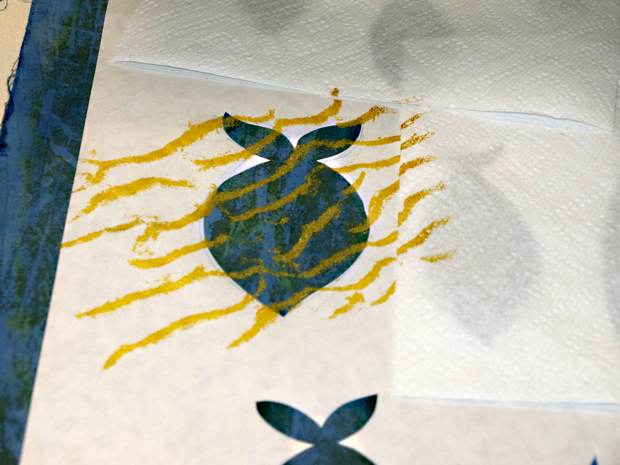 Screen placement (1)Stretch some thread between two pins to act as a guideline when you want to print a row of images. Place the edge of the screen against the thread. 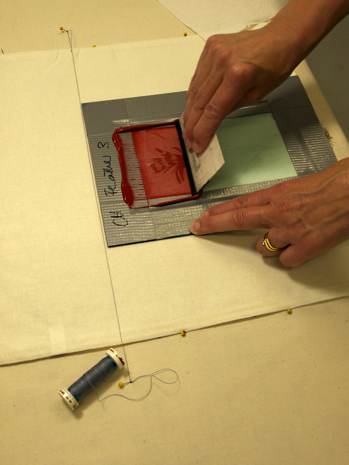 Screen placement (2)Printing your image at regular intervals along a row, e.g. 15cm apart, can be done by placing marker pins along the guideline. Place the screen ready for the first print (start at the left side) and put a pin at the top right hand corner of the screen. Measure 15cm intervals from the first pin along the guideline and mark with more pins. As you move along the row, align the top right corner of the screen with the pins. 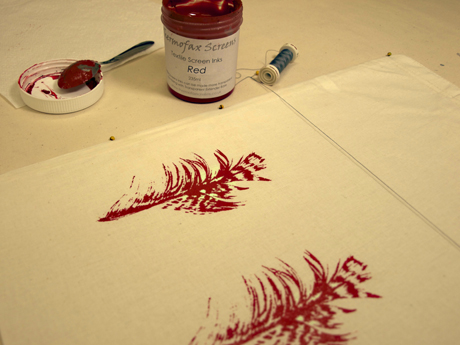 Screen placement (3)Printing off the edge of the fabric will avoid creating dead space around the printing and the whole of the fabric usable. 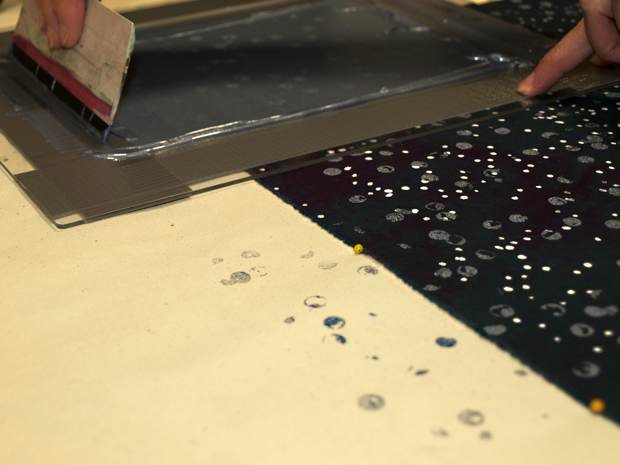 Screen placement (4)Rotating the screen to vary the angle will help to achieve a random allover design. 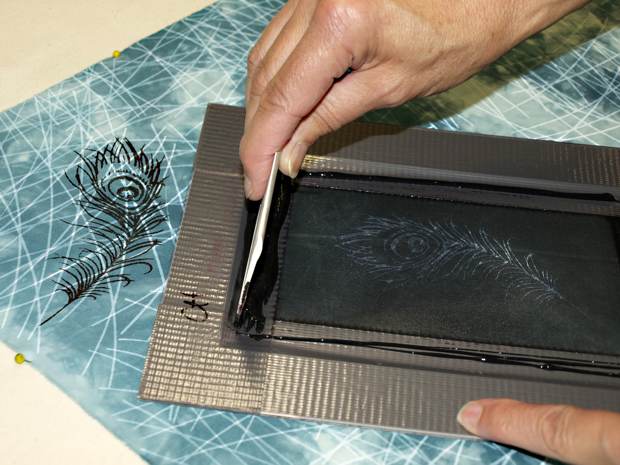 Screen placement (5)Two or more screens can be used to create a multi-layered fabric. Print background texture(s) first and then print motif(s) over the top. 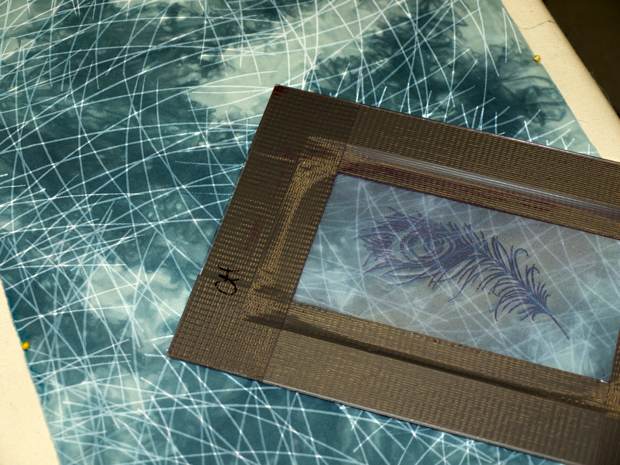 Screen placement (6)Two or more screens of varying scale can be used to provide extra interest.  Screen placement (7)Place a piece of plastic or acetate between the front and back layers of a bag or t-shirt to avoid ink going right through to the back of the bag or t-shirt. 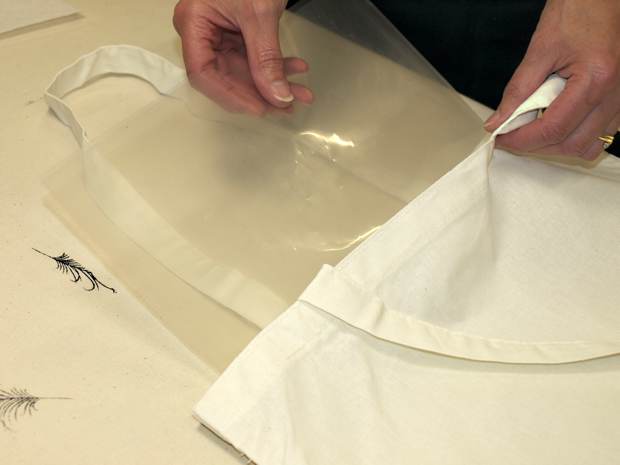
|
screens4printingshopping with ussubscribe to our mailing list
© 2024 screens4printing |